How Power Users Run Unlimited WebChats in One CBB Account — And When to Split for Scale
If you manage bots for multiple businesses or clients, you know most platforms make you pay for every account.
But CBB is built for power users. Our most advanced users, like Mere Hicks, have figured out how to streamline every webchat — for every brand or agent — all inside a single account. (Yes, you read that right.)
But here’s the twist: when you’re ready to add Facebook, WhatsApp, or Instagram, or when your business outgrows the “hack,” CBB makes it dead-simple to scale with dedicated accounts for every channel and client.
It’s power, flexibility, and real-world growth — all in one platform.
In this article, we dive deep into the practical setup shared by Mere Hicks, one of our talented co-creators, who demonstrates exactly how she uses tags and conditions to run multiple web chats with different agents — all within one Chatbot Builder (CBB) account.
This approach is a game-changer for anyone using Chatbot Builder AI or exploring the best chatbot building platform options.
It not only simplifies management but also enables you to integrate multiple large language models (LLMs) like OpenAI or Gemini seamlessly.
Let’s unpack her method step-by-step so you can implement it and optimize your chatbot workflows.
Why Use Tags and Conditions in CBB?
Mere starts by explaining the core concept behind her setup: using tags and conditions to differentiate between various web chats and agents. Instead of creating separate accounts for every business or chatbot agent, she leverages these features within a single CBB account to route conversations appropriately.
This approach is especially valuable if you:
- Manage chatbots for multiple clients or businesses.
- Want to experiment with different AI models like OpenAI or Gemini without switching platforms.
- Need to keep your chatbot workspace organized and efficient.
By assigning tags to users based on their interactions and applying conditions to check these tags, you can control exactly which chatbot agent or flow handles each conversation.
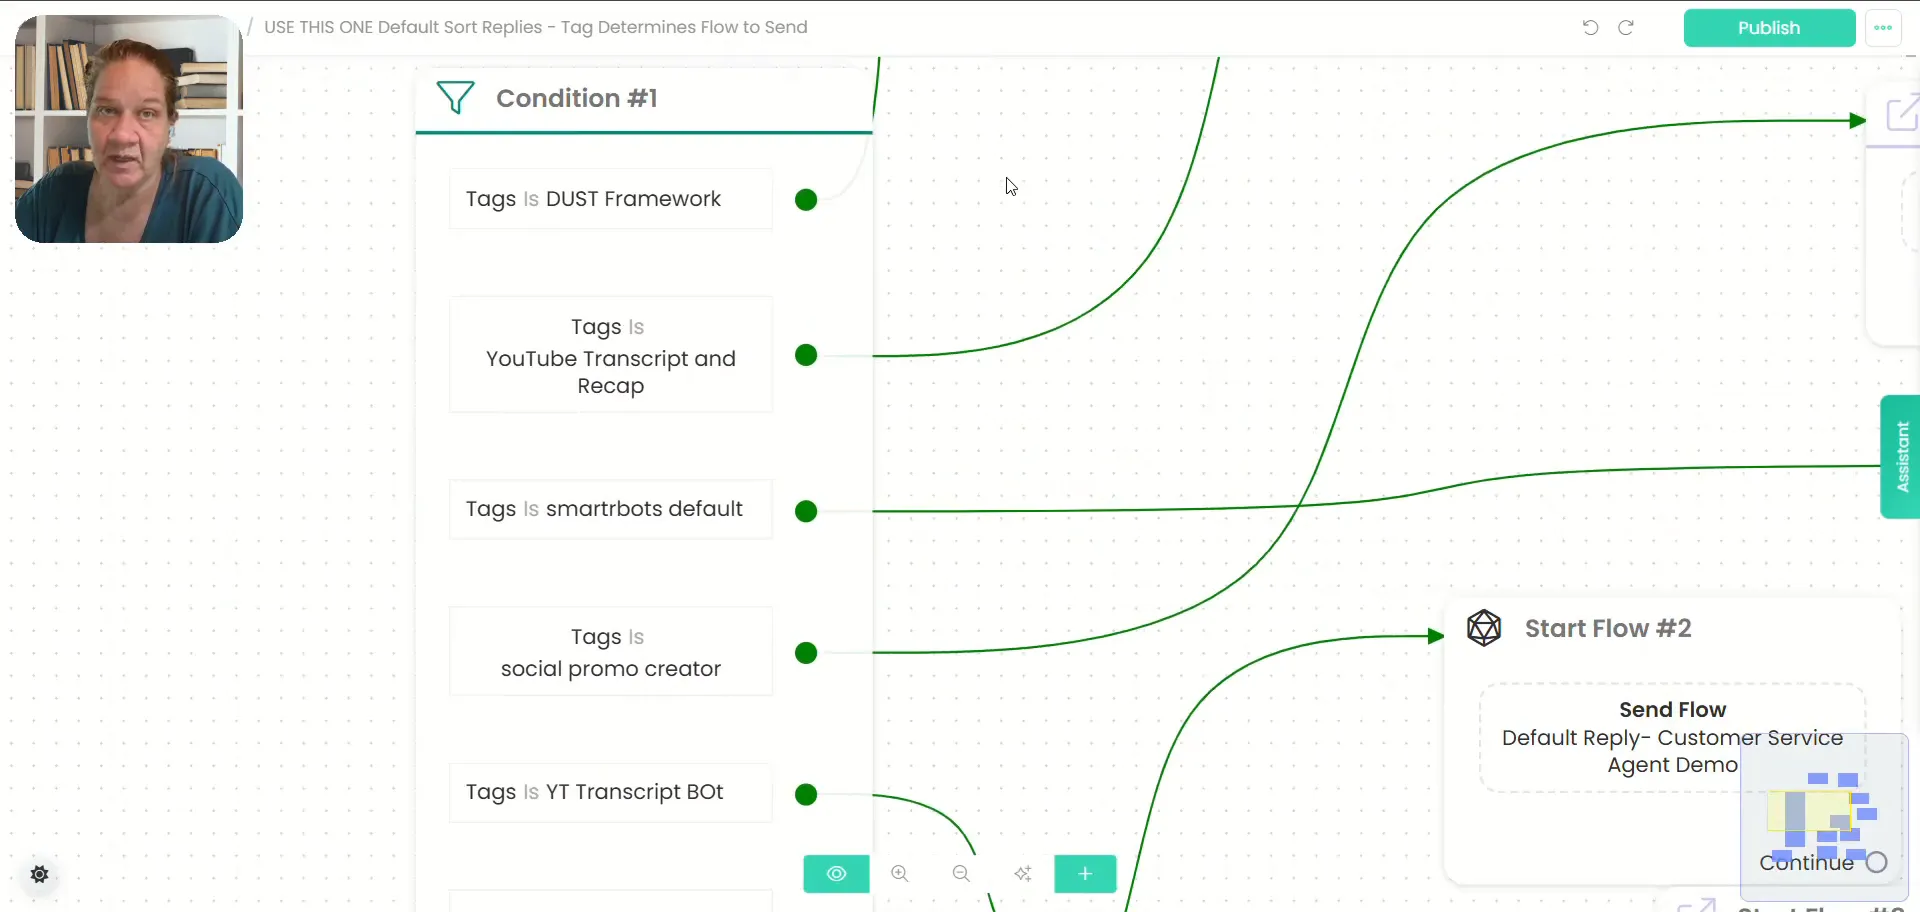
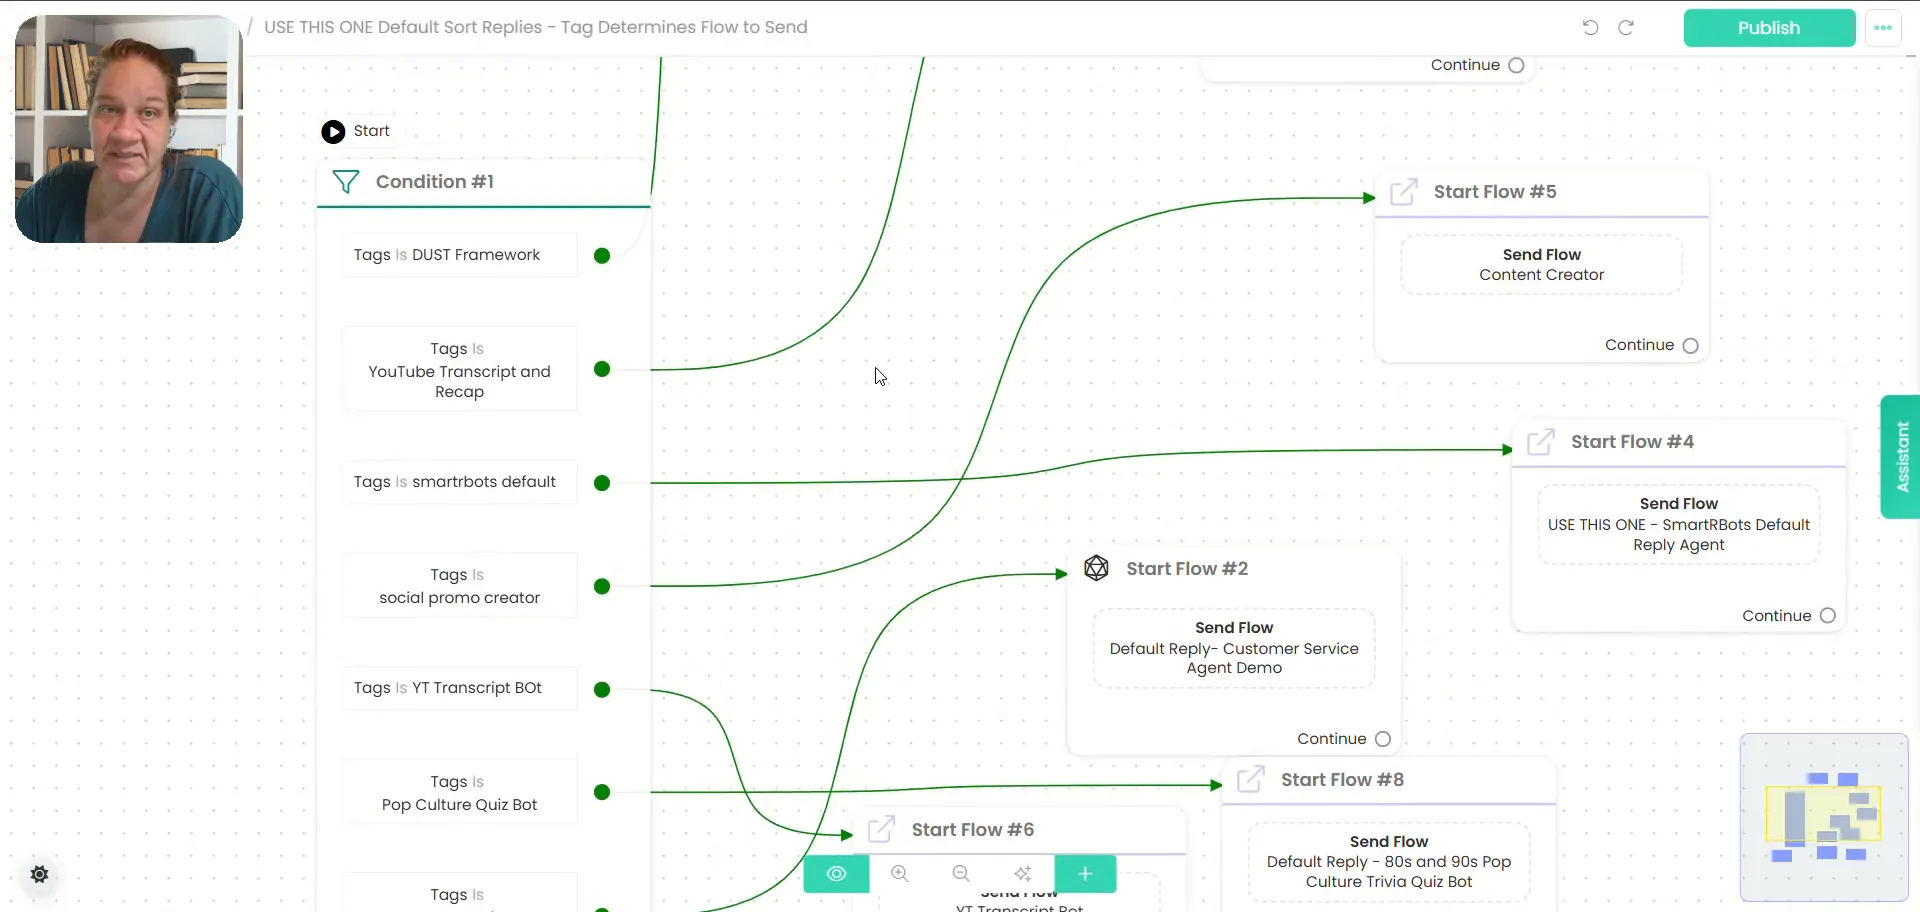
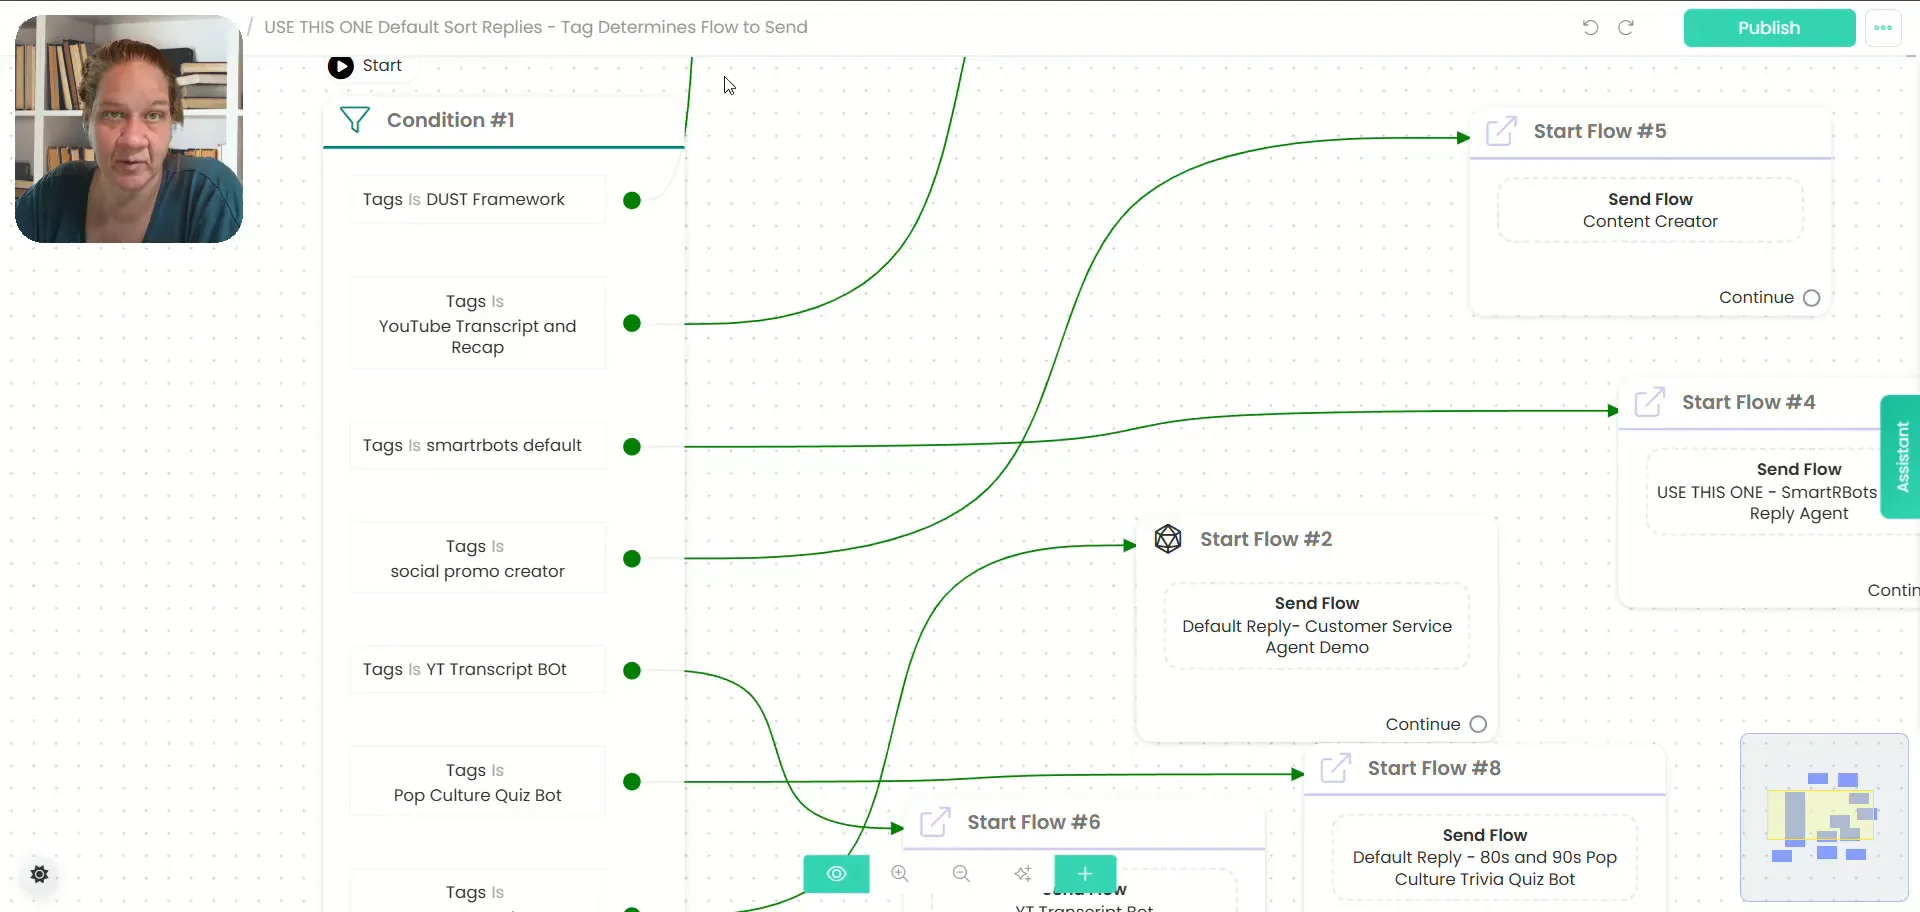
Step 1: Setting Up Your Default Reply with Conditions
The starting point of Mere’s system is her default reply. This is the message or flow that triggers when a user sends a message but hasn’t matched any specific condition yet.
Here’s how she sets it up:
- Start with a condition that checks for tags. The default reply first determines which tag a user has. Each tag corresponds to a particular chatbot flow or agent.
- Route the conversation based on the tag. Depending on the tag, the user is directed to the appropriate flow.
This conditional logic is key to running multiple web chats effectively within one account. For example, if a user has the tag “Smarter Bots,” the system sends them to the “Smarter Bots” agent flow.
Interestingly, Mere mentions sometimes she skips a welcome message and jumps straight to the default reply for simplicity.
Even in this case, the tag management remains vital to ensure the right flow handles the conversation.
Step 2: Creating a Welcome Message with Tag Management
Next, Mere walks us through her welcome message setup, which is the first interaction a user typically receives when they start a chat.
Key points in her welcome message setup include:
- Adding a specific tag. This tag identifies the user and the flow they belong to.
- Removing any other tags. This cleanup step prevents users from having conflicting tags that could misroute their conversations.
- Automation for returning users. If a user provides their email, an automation sends them a link to return to the web chat later, enhancing user experience.
- Auto-skip after inactivity. If a user opens the chat but doesn’t respond within three minutes, the conversation is cleared automatically to prevent cluttering the account with empty chats.
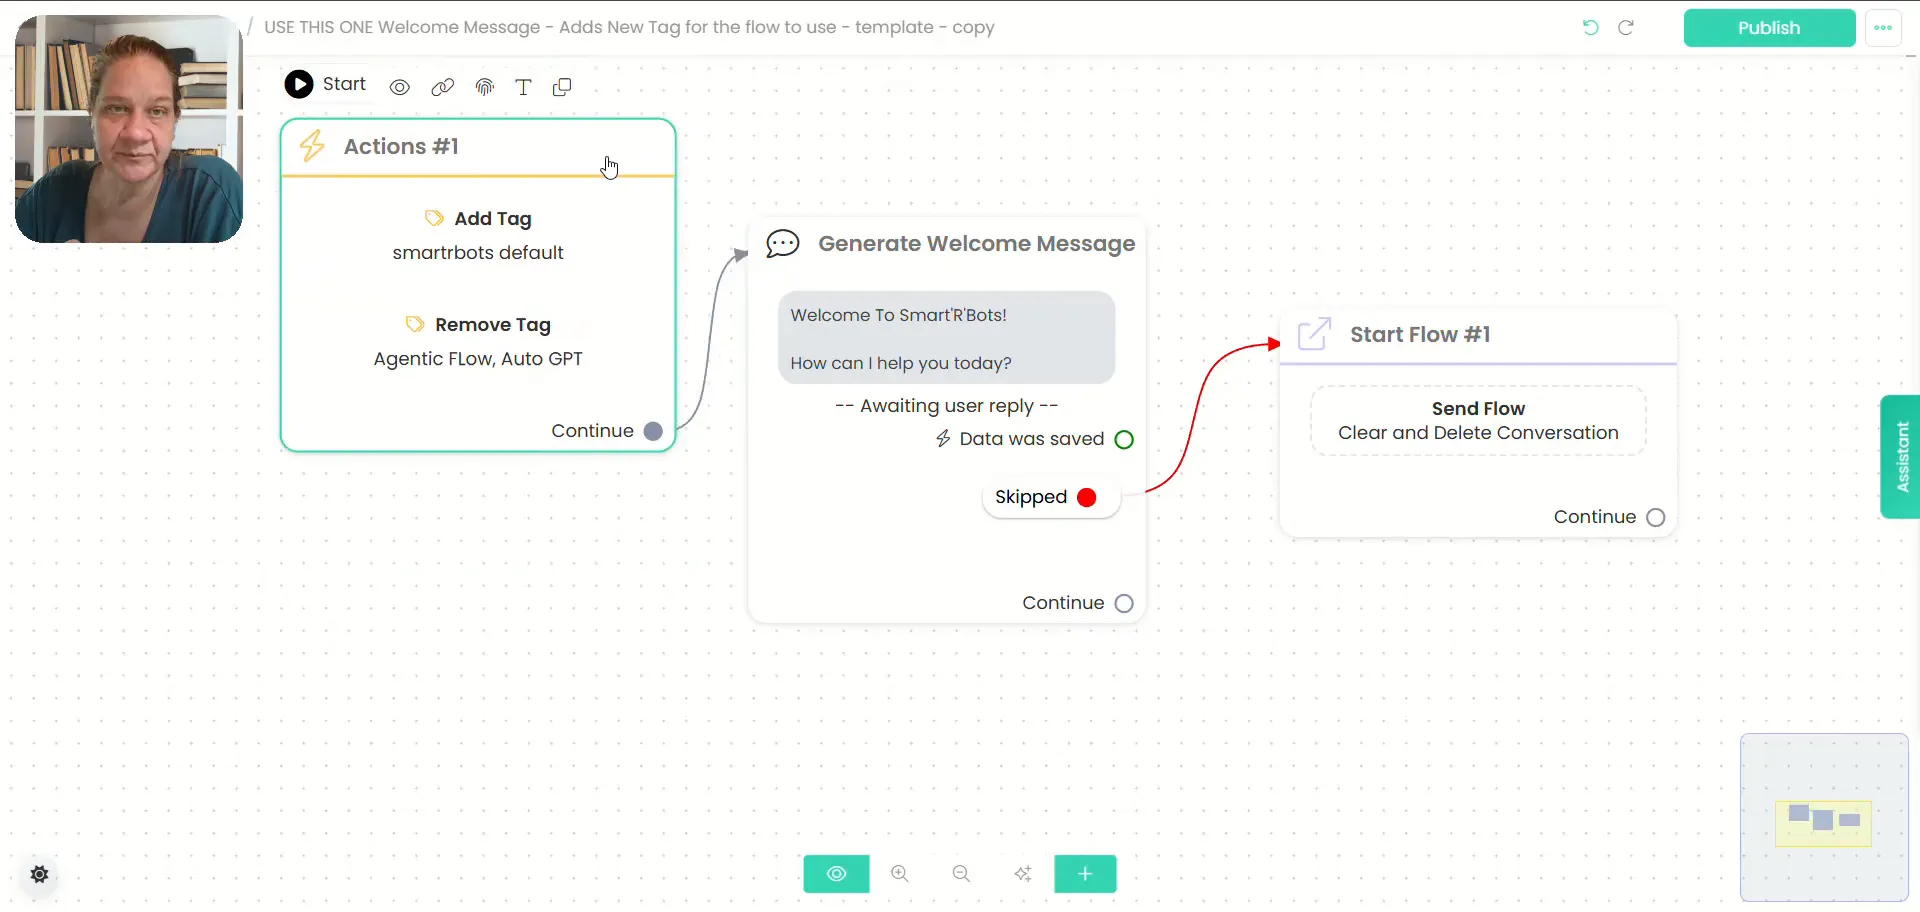
This welcome message acts as the foundation for a clean and organized chat environment.
By managing tags right from the start, Mere ensures every user is correctly categorized, and her account remains uncluttered.
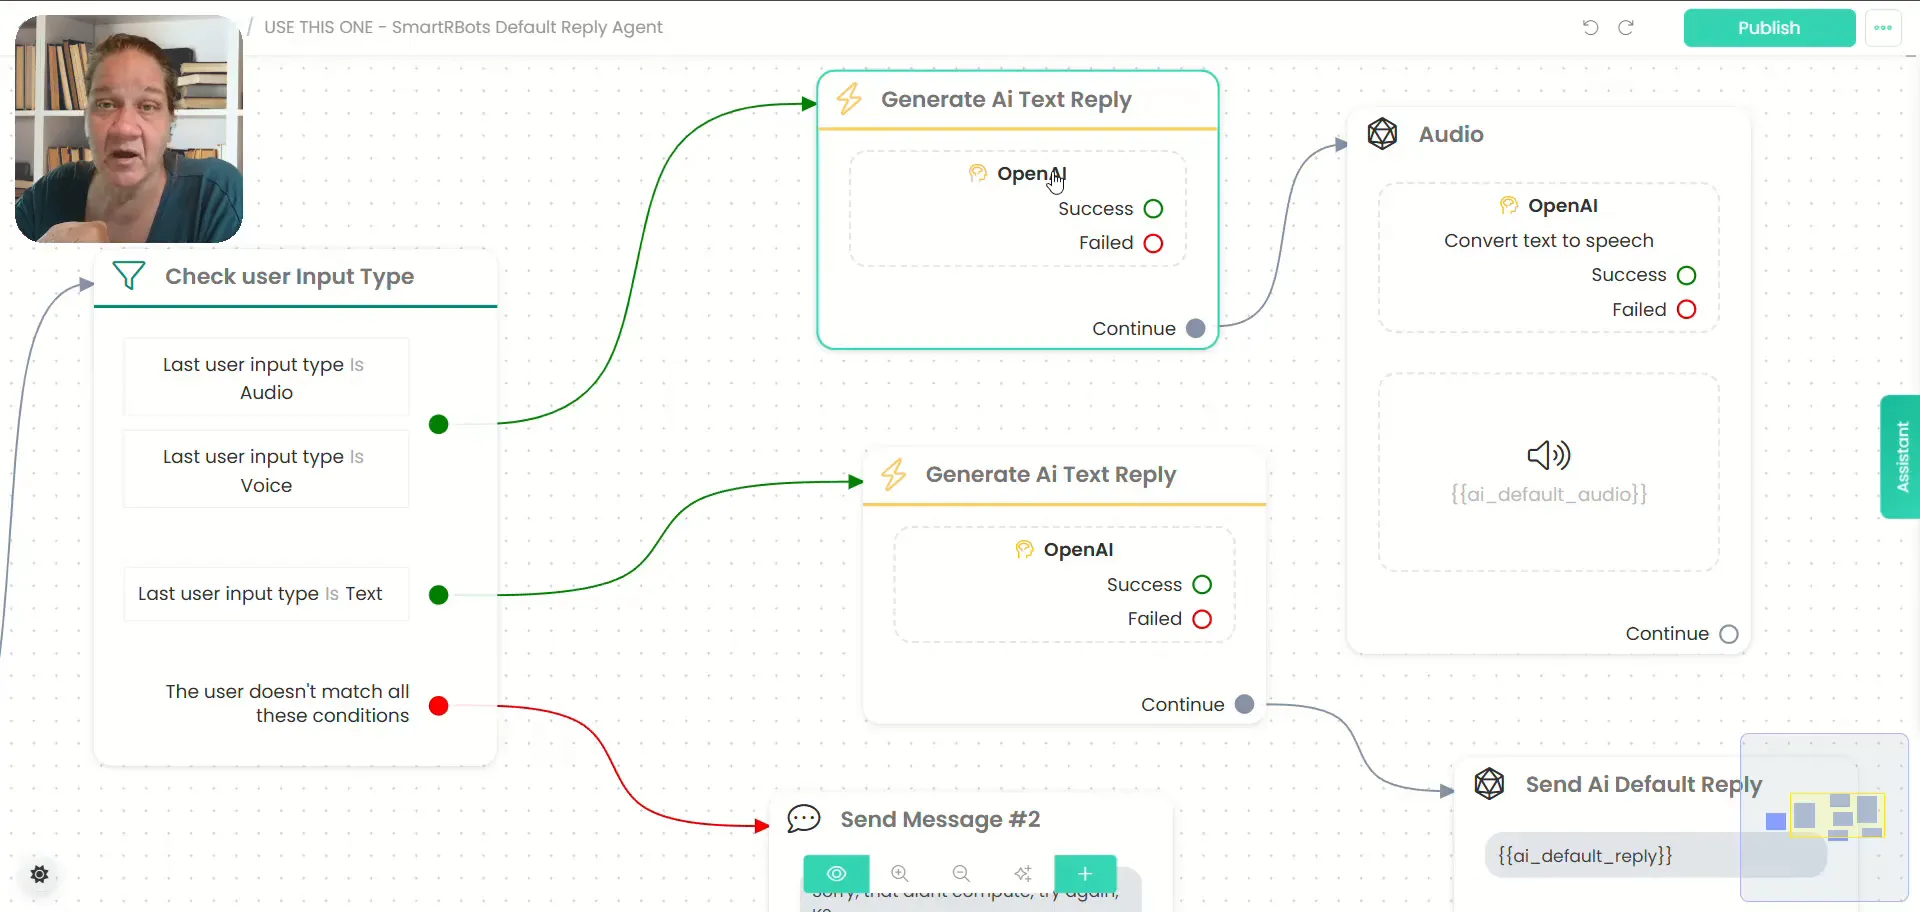
Step 3: Handling Different Input Types with Conditions
One of the most impressive parts of Mere’s setup is how she handles different input types — specifically, audio/voice versus text inputs.
Here’s how it works:
- Check the last input type. The system uses a condition to determine if the user’s last input was audio/voice or text.
- If audio/voice: The message is passed to an OpenAI agent configured to process audio. The text generated from the audio is converted back into speech and sent as an audio reply.
- If text: The same OpenAI agent handles the input but responds with a text reply instead of audio.
- If the input doesn’t match these types (e.g., photo or audio file): The user receives a polite error message, “Sorry, that didn’t compute. Try again.”

This dual handling of audio and text within the same flow is a powerful example of flexibility.
It means you can offer users multiple ways to interact without having to create separate bots or flows.
Step 4: Integrating Multiple AI Models and Customizing Agents
Mere also touches on how you can customize this setup to work with different AI providers.
While her example uses OpenAI, she points out that you could swap this out for Gemini or any other LLM you prefer.
This is done by:
- Changing the AI integration in the flow to the desired provider.
- Using conditions to select which AI agent to use for particular chats or tags.
For example, you might have one tag that routes to an OpenAI-powered agent and another tag for a Gemini-powered agent, both running smoothly within the same CBB account.
This flexibility is crucial for anyone experimenting with various AI technologies or managing clients with different preferences.
Additional Tips from Mere’s Setup
- Always clean up tags: Removing irrelevant tags at key points avoids confusion and routing errors.
- Use auto-skip for inactive chats: This keeps your dashboard tidy and your contacts list manageable.
- Label your flows clearly: Mere names her default reply “default sort reply” to remind herself what it does, which is a great organizational habit.
- Test different input types: Ensure your chatbot gracefully handles unexpected inputs with fallback messages.
Why This Matters for Chatbot Builders and AI Enthusiasts
Whether you’re a seasoned chatbot developer or just starting with AI chatbots, managing multiple bots and agents can quickly become overwhelming.
Mere’s approach highlights how Chatbot Builder AI empowers you to consolidate your chatbot operations without sacrificing customization or user experience.
By using tags and conditions strategically, you can:
- Run multiple web chats for different businesses or purposes within one account.
- Offer multi-modal input/output options like text and audio seamlessly.
- Experiment with different AI models without switching platforms.
- Keep your chatbot environment organized, clean, and efficient.
This makes Chatbot Builder one of the best chatbot building platforms for anyone looking for scalability combined with simplicity.
Conclusion
Mere Hicks’ tutorial showcases a smart, efficient way to manage multiple chatbot agents and web chats in a single CBB account using tags and conditions.
Her method ensures smooth routing based on user tags and input types, supports multiple AI integrations, and maintains an organized workspace by cleaning up inactive conversations.
If you’re looking to optimize your chatbot workflows, enhance user experience, and experiment with different AI technologies, this setup is definitely worth trying.
The power of Chatbot Builder AI combined with clever tag and condition usage opens up exciting possibilities for chatbot builders everywhere.
Pro Tip
Start with this multi-webchat setup for web-based bots, but when you’re ready to scale to social channels or enterprise clients, switch to CBB’s multi-account tools for clarity, clean handoffs, and future-proof growth.
Ready to run smarter?
Join the builders, creators, and agencies who trust CBB to handle everything from their first bot to their full enterprise fleet.
Explore Chatbot Builder AI now — and see just how far you can take it.
.png)

(2).png)